Who knew zucchini could transform into something so surprisingly scrumptious? I’ve always loved pizza, but sometimes you need a break from the classic crust—especially after that summer when I tried growing my own zucchini and ended up with a surplus. This zucchini pizza crust is like a quirky dance partner, twirling between healthy and delicious. Plus, it holds toppings like a champ!
Steps
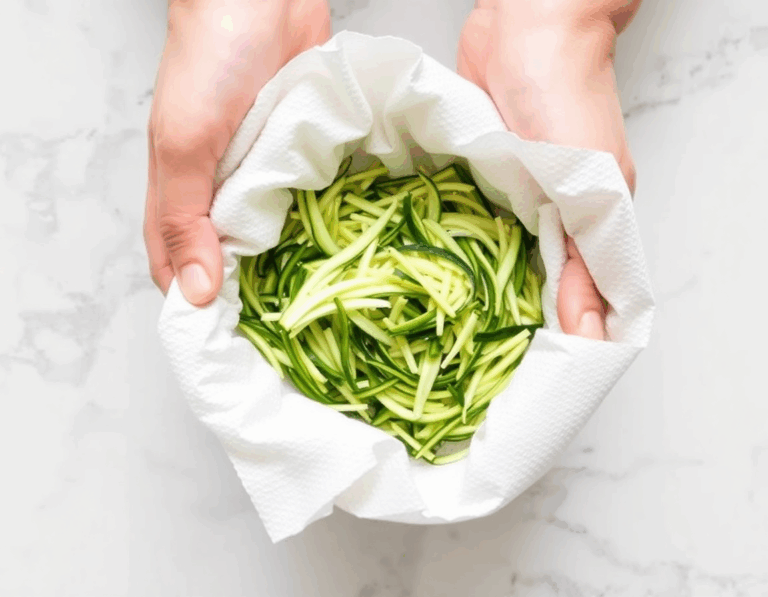
- Preheat the oven to 500°F and prepare a baking sheet with parchment paper and cooking spray. Arrange the shredded zucchini on a plate lined with paper towels, sprinkle with salt, and let it sit for 10 minutes.
- Wrap the zucchini in paper towels or cheesecloth and squeeze to remove excess moisture. In a medium bowl, mix the zucchini with flour, an egg, cheese, and Italian spices until fully combined.
- Transfer the mixture onto the prepared baking sheet and press it into your desired shape and thickness, aiming for about 1/4 inch thick. Bake for 10 minutes or until the crust begins to brown.
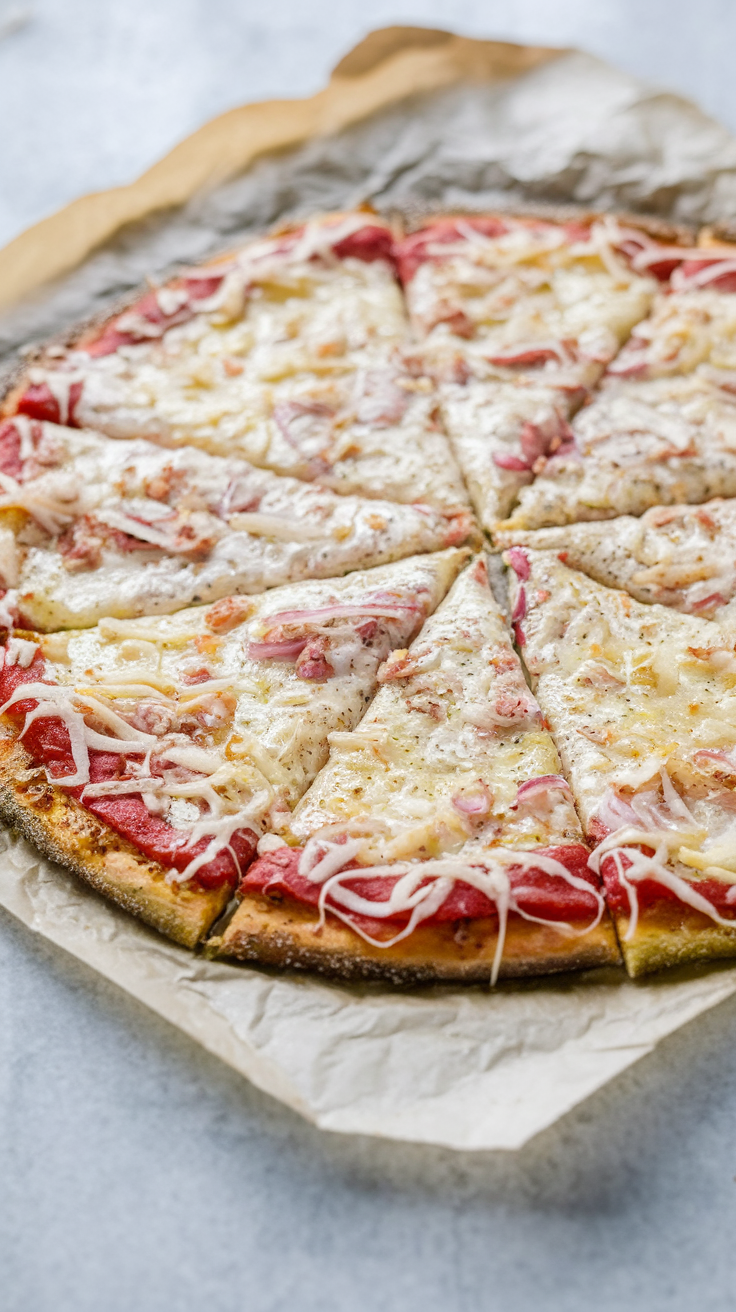
- Remove the crust from the oven and add your choice of sauce, cheese, and toppings. Return to the oven and bake for another 5 to 7 minutes, until the cheese is melted and bubbly.
Ingredients
- Zucchini, shredded (amount not specified)
- 1 tablespoon salt
- 1 egg
- Shredded cheese (amount not specified)
- Flour (amount not specified)
- Italian spices (amount not specified)
- Cooking spray
- Parchment paper
FAQ
- What makes zucchini a good alternative for pizza crust?
- Zucchini is an excellent choice for a low-carb pizza crust as it provides a thin, crispy base that can hold various toppings. It’s also loaded with cheese and Italian spices, giving it a delicious flavor profile that traditional pizza dough doesn’t offer.
- How do you ensure the zucchini crust is crispy?
- To achieve a crispy crust, shredded zucchini is placed on paper towels and sprinkled with salt to draw out moisture. Afterward, it’s combined with cheese, egg, flour, and spices, and baked without toppings for 10 minutes before adding your desired toppings.
- Can you customize the toppings on the zucchini crust pizza?
- Yes, once the crust is pre-baked, you can add your favorite sauce, cheese, and toppings before baking it again for 5-7 minutes until the cheese is perfectly melted and bubbly.
- What is the recommended thickness for the zucchini crust?
- For optimal results, press the dough into a thickness of about 1/4 inch. This ensures that the crust is sturdy enough to hold toppings while remaining crispy.
- How do you remove excess moisture from the zucchini?
- After salting the shredded zucchini and letting it sit for 10 minutes, wrap it in paper towels or a clean cheese cloth and squeeze out all the excess water to ensure a dry mixture for the crust.
Tips
- Remove Moisture Thoroughly: After salting the shredded zucchini, make sure to squeeze out as much moisture as possible using paper towels or a clean cheese cloth. This step is crucial for achieving a crispy crust.
- Pre-Bake the Crust: Before adding any toppings, bake the crust for about 10 minutes. This ensures that the base becomes crispy and sets properly.
- Customize Thickness: When shaping the dough, press it to your preferred thickness. A quarter-inch thickness works well for a crispy texture.
- Watch the Baking Time: Once the toppings are added, keep an eye on the pizza as it bakes for an additional 5-7 minutes. Remove it when the cheese is melted and bubbly to avoid overcooking.
Equipment
- Carb Zucchini Crust Pizza that you might consider purchasing on Amazon:
- Cheesecloth – Useful for squeezing out excess moisture from the shredded zucchini.
- Parchment Paper – Essential for lining the baking sheet to prevent sticking.
- Baking Sheet – A sturdy option may be needed if you don’t have one suitable for high-heat baking.
- Cooking Spray – Non-stick spray to help prevent the crust from sticking to the parchment paper.