Ever since I stumbled across the wonders of keto-friendly desserts, my kitchen’s been a whirlwind of sweet experiments—and this Keto Tres Leches Cake is the crowning glory! Imagine soaking up all the creamy goodness without a speck of guilt. Recently, I shared a slice with my neighbor, who couldn’t believe it was low-carb—her eyes nearly popped out!
Steps
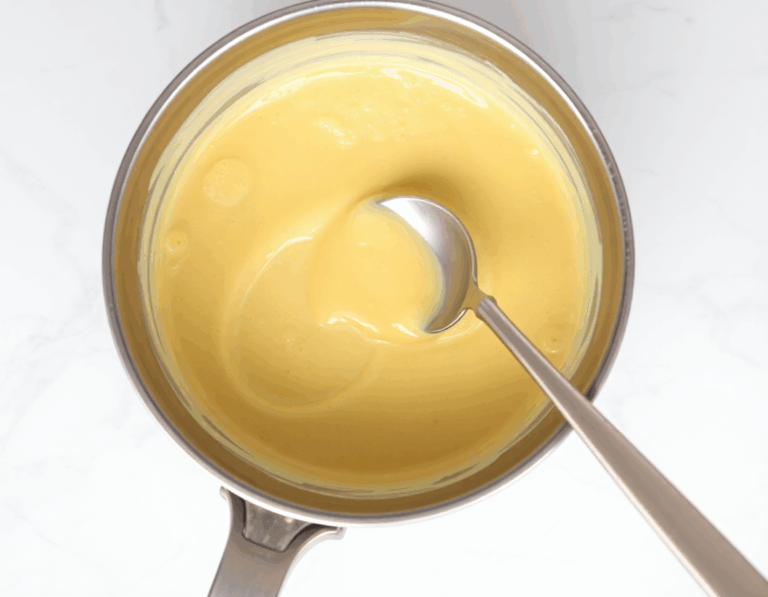
- In a pot over medium heat, melt the butter and add a sugar substitute. Stir in vanilla and heavy cream, then bring to a boil. Reduce to a simmer, stirring often to avoid burning, until it thickens to a pudding-like consistency and coats the back of a spoon. Set aside to cool.
- In a bowl, mix all the cake ingredients and pour the batter into a greased 9×13 casserole dish. Bake at 350°F (175°C) for 20 minutes, checking with a toothpick for doneness. If needed, bake a little longer until the cake is fully cooked.
- While the cake is baking, whisk together the single cream, double cream, and the prepared condensed cream in a separate bowl. Once the cake is done, remove it from the oven and poke holes all over with a fork or skewer.
- Pour the cream mixture over the cake, spreading it gently with a spoon to ensure it seeps into the holes. Let the cake cool for at least 3 hours in the fridge, or overnight for best results.
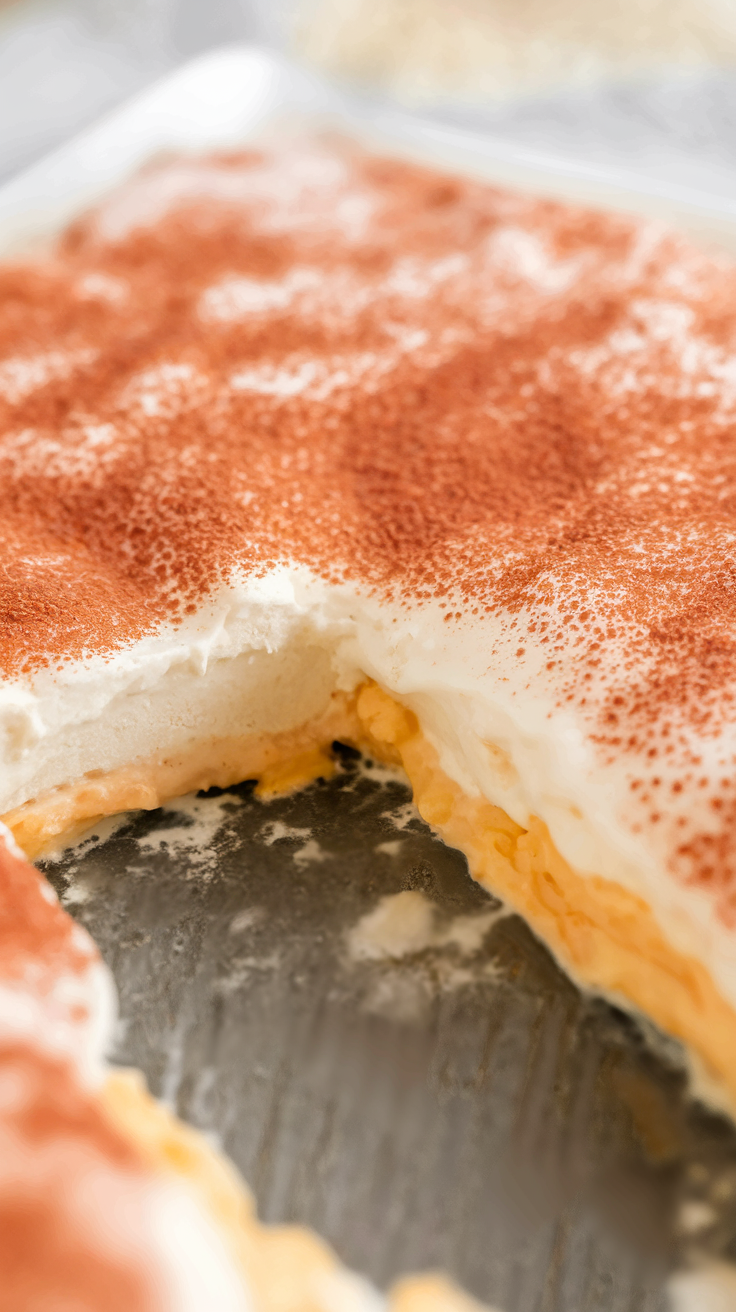
- Just before serving, whip cream with vanilla and a sugar substitute until it forms peaks. Spread the whipped cream over the cake, cut into slices, and savor your delicious keto tres leches cake.
Ingredients
- Butter: for melting in the condensed milk.
- Confectioners sugar substitute: to sweeten the mixture.
- Vanilla extract: for flavoring.
- Heavy cream: used in the condensed milk and cake mixture.
- Single cream: for the milk mixture.
- Double cream: for the milk mixture.
- Condensed cream: homemade as per the instructions.
- Additional cream: for whipping and topping the cake.
- Additional vanilla extract: for the whipped cream.
- Additional sugar substitute: for the whipped cream.
Nutritional Values
Calories: 3960 | Total Fat: 396g | Carbohydrates: 64.5g | Fiber: 24g | Net Carbs: 40.5g | Protein: 73.5g
FAQ
- What is the best way to prevent the condensed cream from burning?
- To avoid burning the condensed cream, stir it frequently while it simmers. You don’t need to stir it constantly, but regular stirring will help prevent it from sticking to the bottom and burning.
- Can the condensed milk be made vegan?
- Yes, you can make a vegan version of the condensed milk by using coconut milk instead of cream and omitting the butter. This will give the condensed milk a delicious coconut flavor.
- How do I ensure the cake absorbs the cream well?
- After baking the cake, use a fork to poke several small holes into it. This will allow the cream mixture to soak into the cake more effectively. Additionally, make sure the cake is fully cooked; an undercooked cake might not absorb the cream properly.
- How long should the cake be refrigerated to soak up the cream?
- It is recommended to refrigerate the cake for at least 3 hours to allow it to soak up the cream. However, leaving it to soak overnight will yield the best results.
- What should I do if my cream mixture foams up while simmering?
- If the cream mixture starts to foam as it simmers, lower the heat and continue stirring. This will help control the foaming and prevent it from overflowing.
Tips
- Stir the condensed cream frequently to prevent it from burning and leaving specks in your mixture. If any browning occurs, you can strain it out for a smoother result.
- When baking the cake, it’s better to slightly overbake than underbake. An undercooked cake may not absorb the cream well and could feel gritty.
- Use a fork to poke holes in the cake after baking. This creates more, smaller holes, allowing the cream to seep in more effectively.
- For optimal flavor and texture, let the cake soak in the cream mixture in the fridge for at least 3 hours, but overnight is best if you have time.
Equipment
- 9×13-inch casserole dish
- Whisk
- Mixing bowls
- Medium saucepan or pot
- Toothpick (or cake tester)
- Skewer (optional, if preferred over a fork for poking holes)
- Measuring cups and spoons