Ever since my neighbor introduced me to the magic of coconut flour, I’ve been on a pie-making spree that I can’t quite explain. There’s something about the way it crumbles just right and adds a nutty sweetness that transforms any filling into a masterpiece; it’s like finding the perfect song to fit your mood on a rainy day. Oh, and did I mention that it’s gluten-free? Not that it matters—this crust is a winner regardless of dietary needs, just like the latest Taylor Swift album that everyone seems to be talking about.
Steps
- Begin by preheating your oven to 350°F (175°C). In a food processor or stand mixer, whisk together the eggs, oil, and vanilla extract until fully combined.
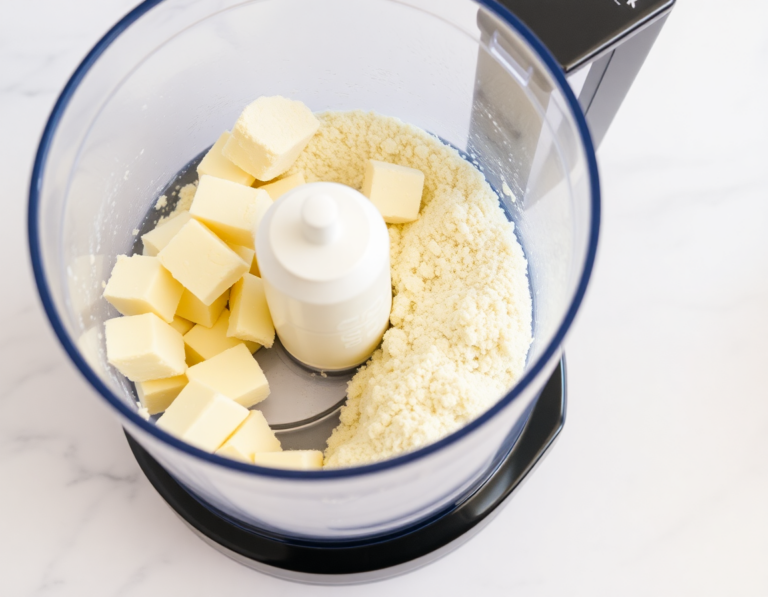
- In a separate bowl, mix the coconut flour, salt, and any additional spices for savory pies. Gradually add this dry mixture into the wet ingredients in the food processor.
- Incorporate the cold, cubed butter into the mixture by pulsing in the food processor until the mixture resembles coarse crumbs.
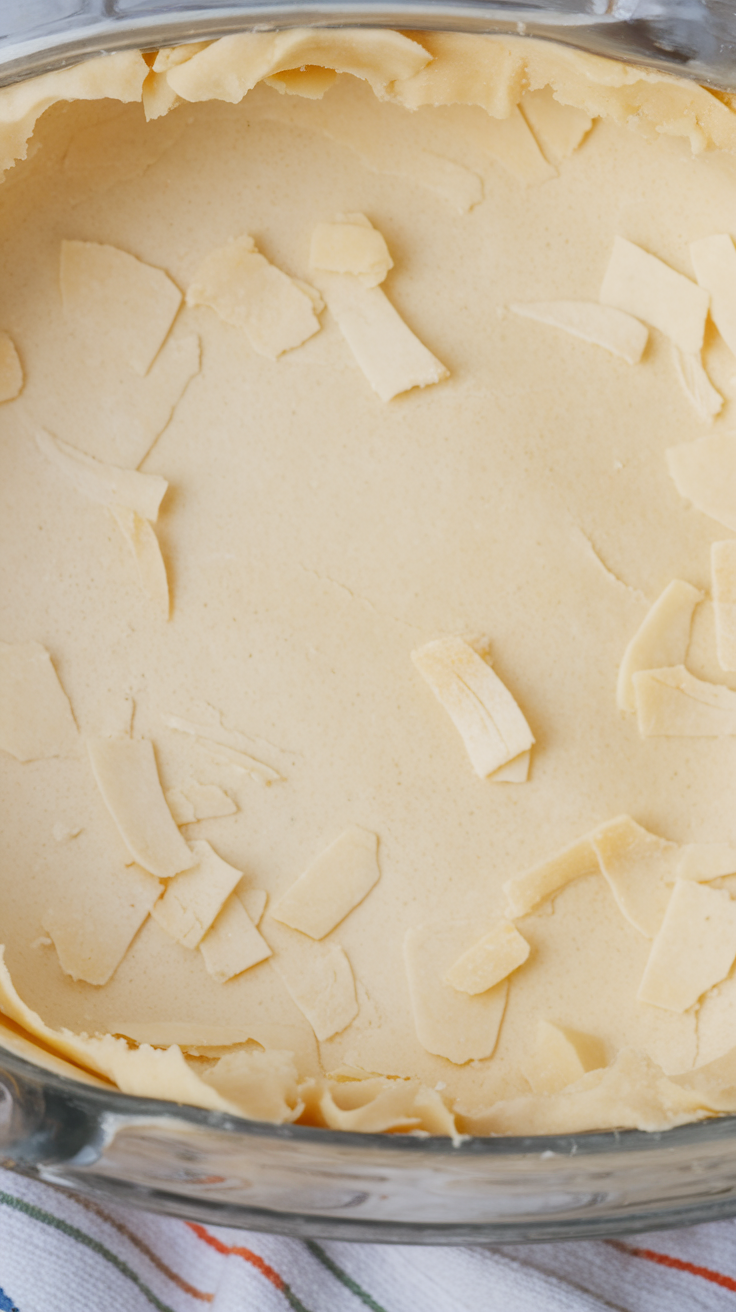
- Prepare a pie plate by spraying it with cooking spray. Transfer the dough into the pie plate and press it evenly with your hands, or alternatively, roll the dough between two sheets of parchment paper and flip it into the pie plate.
- Use a fork to prick holes randomly in the bottom of the crust. Bake the crust for 10 to 15 minutes until it turns golden brown.
- If the pie crust will undergo further baking with a filling, cover the edges with aluminum foil to prevent burning. Once the crust is baked and cooled, add your desired filling.
Ingredients
- 2 large eggs
- 2 tablespoons extra virgin olive oil
- 1 teaspoon vanilla extract (for sweet pies)
- 1/4 teaspoon salt
- 1 cup coconut flour
- 1/2 cup cold butter, cubed
- Optional: low-carb sweetener (for sweet pies)
- Optional: spices such as onion powder or garlic powder (for savory pies)
Nutritional Values
Calories: 1548kcal | Carbohydrates: 60g | Protein: 24g | Fat: 120g | Saturated Fat: 60g | Cholesterol: 564mg | Sodium: 1752mg | Potassium: 120mg | Fiber: 36g | Vitamin A: 3300IU | Calcium: 72mg | Iron: 1.2mg
FAQ
- Can the keto pie crust be made ahead of time?
- Yes, you can prepare this pie crust in advance. Simply cover it with plastic wrap and refrigerate for up to three days before baking. Alternatively, the crust can be frozen for up to one month.
- Is it possible to substitute almond flour for coconut flour in this keto pie crust recipe?
- No, substituting almond flour for coconut flour in this recipe is not recommended. The two flours have different properties and require significant adjustments to work well. If you’re looking for an alternative, consider using sunflower seed meal or sesame flour instead.
- What are some tips for achieving a flaky keto pie crust?
- To ensure a flaky pie crust, use cold butter in the recipe. This helps create the desired texture. Additionally, using room temperature eggs can make it easier to incorporate them with the other ingredients. A glass pie pan is recommended for even baking, and a silicone crust cover can prevent burning during baking.
- Can someone with a coconut allergy enjoy this pie crust?
- While the recipe primarily uses coconut flour, the taste of coconut is not noticeable, even to those sensitive to it. However, if there is a coconut allergy, it is best to avoid this recipe and consider other nut-free alternatives.
- What are the best fillings to use with this keto pie crust?
- This versatile keto pie crust pairs well with a variety of fillings. Some popular options include sugar-free chocolate cream pie, keto coconut cream pie, savory cheesy sausage quiche, keto chocolate chess pie, keto pumpkin pie, and keto cheesecake.
Tips
- Use Cold Butter: Ensure your butter is cold before using it in the pie crust. This helps achieve the desired flaky texture, which is a staple of good pie crusts.
- Room Temperature Eggs: Incorporate eggs at room temperature for better blending with the other ingredients, making the dough easier to handle.
- Opt for a Glass Pie Pan: Glass pie pans are recommended as they promote even baking, ensuring your crust cooks thoroughly without overbrowning in spots.
- Protect the Crust Edges: Use a silicone crust cover or aluminum foil to shield the edges of the crust. This prevents them from burning, especially if your pie requires additional baking after the crust has been pre-baked.
Equipment
- Food Processor – Essential for mixing the ingredients to the right consistency.
- Silicone Crust Cover – Useful for preventing the crust from burning during baking.
- Glass Pie Pan – Recommended for even baking of the pie crust.
- Parchment Paper – Used for rolling out the dough and for blind baking with pie weights (if not already available at home).
- Pie Weights – Helpful for blind baking the pie crust to prevent it from puffing up.